Jupyterhub
Overview
Teaching: 0 min
Exercises: 0 minQuestions
How to get access to Jupyterhub?
How to start/stop Jupyter notebooks in the Jupyterhub?
Objectives
Learn about Jupyterhub
Introduction of Jupyterhub
The CMIP6 data analysis will be conducted directly at jupyterhub. We will be using https://geo4962.tacco.sigma2.no/. The main advantage of this is that all the data we need are directly accessible through the web interface and the necessary post-processing and visualization packages we need are already available.
Setup instructions for accessing Jupyterhub
- You should have received an info email containing an invitation link. If not please request it to the course organizers.
- Follow the invitation link in the email message
- Log in with your University of Oslo Feide account
- Accept the policies and agree to become a member of the group GEO4962
- Now go to GEO4962 Jupyterhub
- Log in with your University of Oslo Feide account
- You should now be logged in to the JupyterHub in your web browser!
For later usage of the notebooks just use the GEO4962 Jupyterhub link
Start and stop your server
When you manage to successfully login to the Jupyterhub, you should have the following panels:

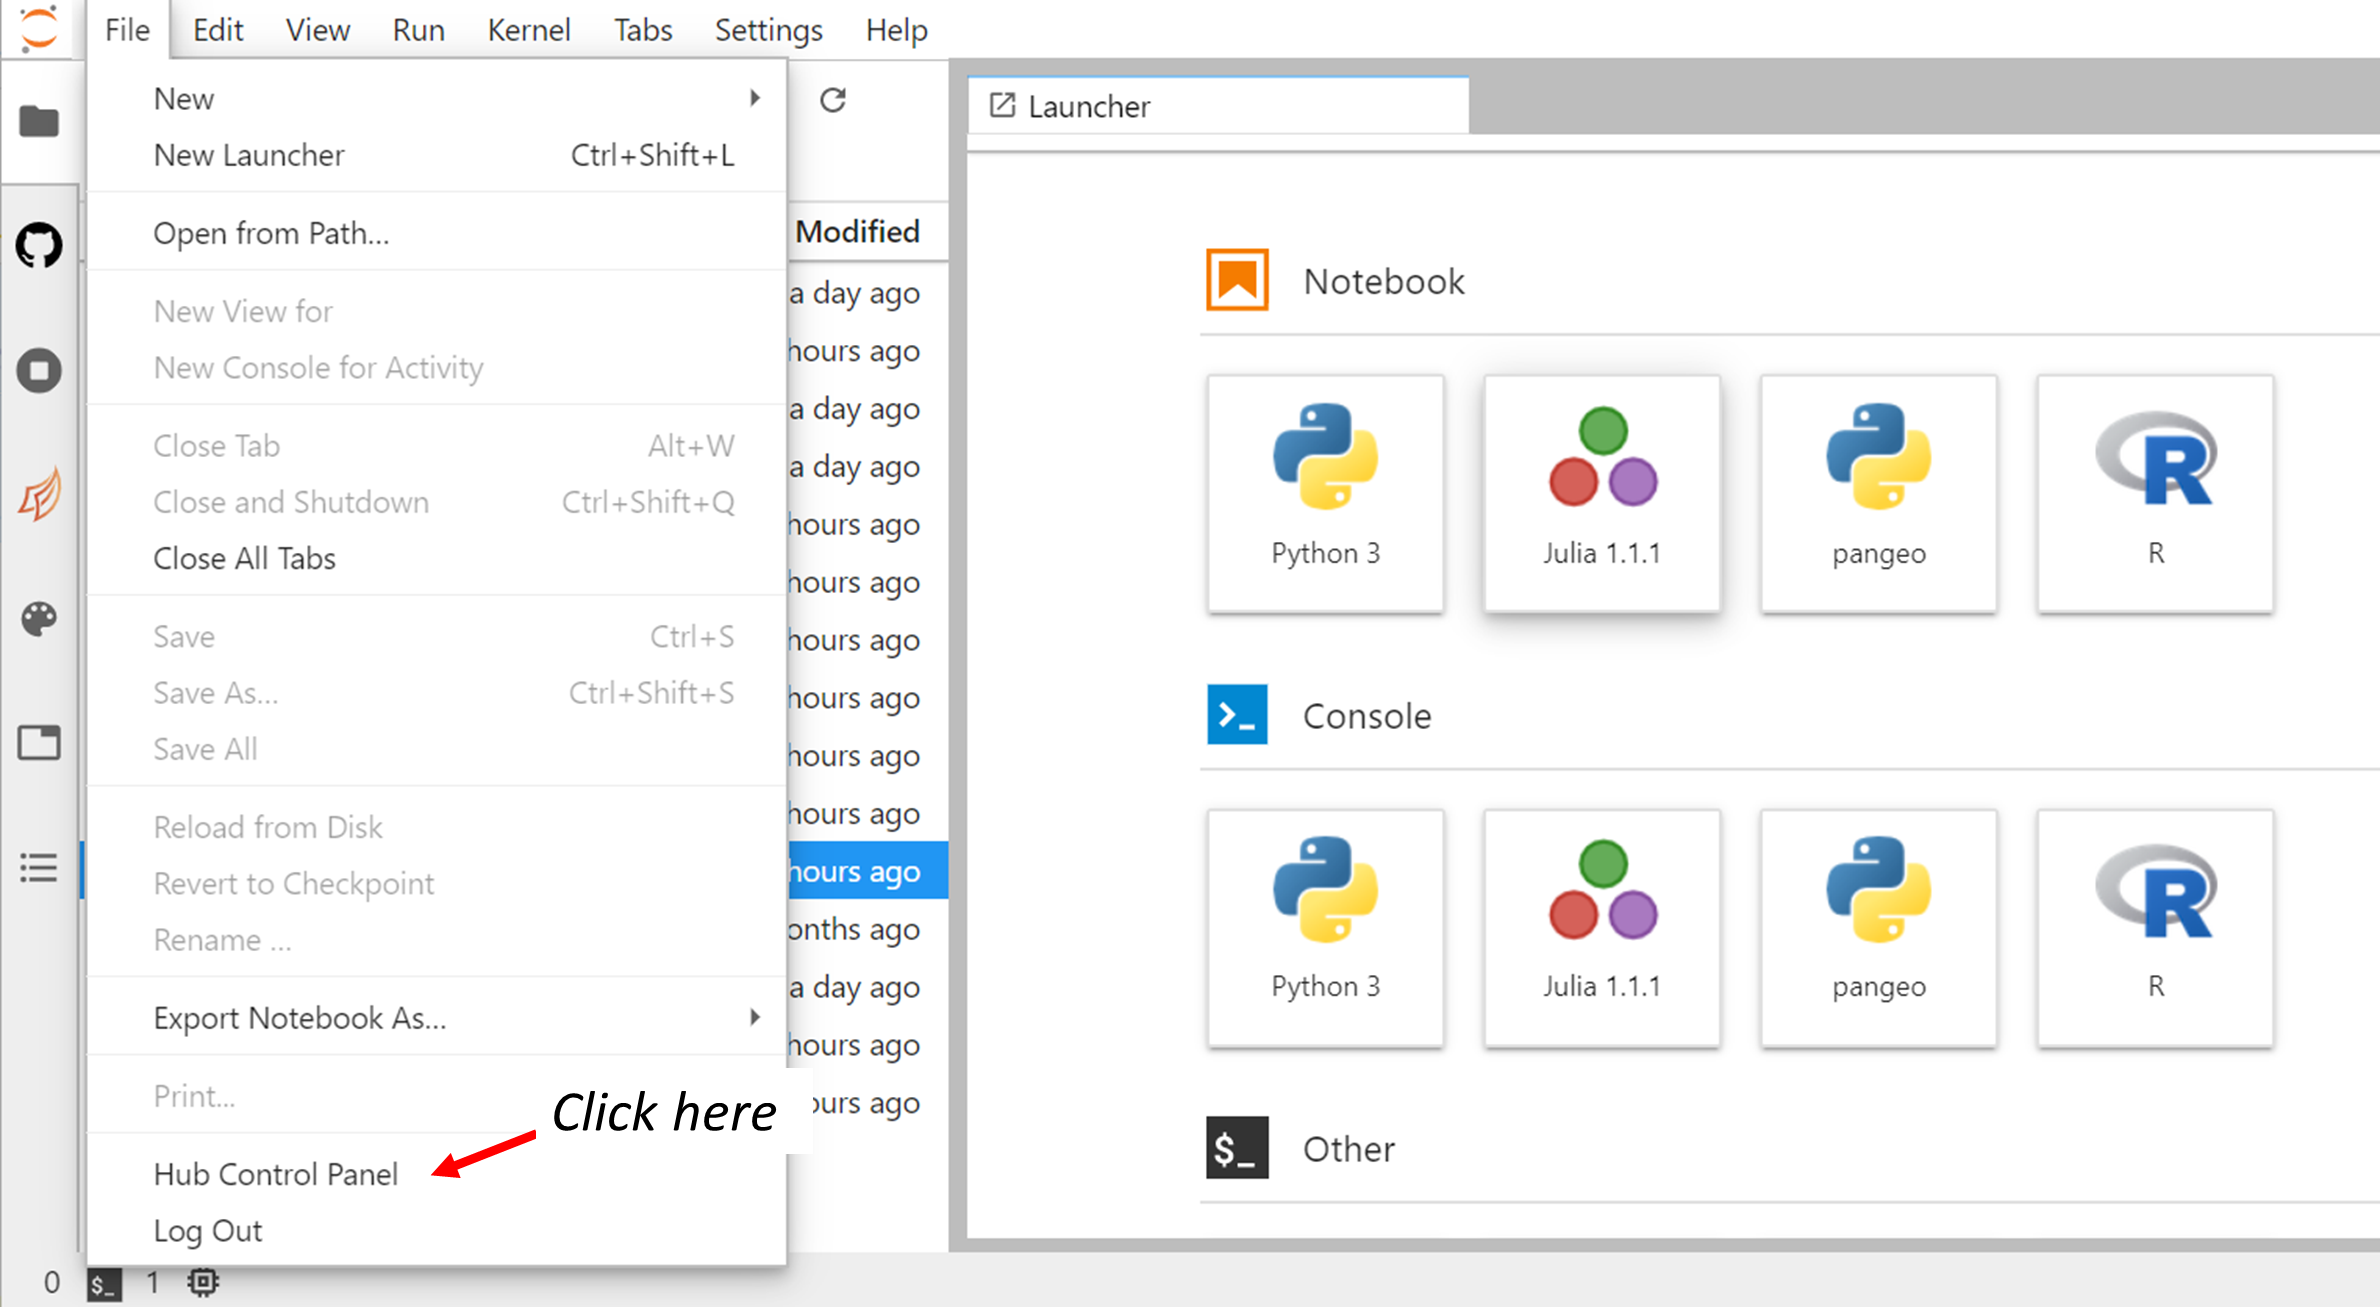
To start/stop your server, click on Hub Control Panel:

When your server is not running, the button “Stop My Server” does not appear and you only see the button “My Server”.
- To stop your server, click on “Stop My Server”
- To start your server, click on “My Server”
Important note
Make sure you stop your server once you have finished your session. We need to do this to release resources for next time.
The JupyterLab Interface
By default, you will get the web-based user interface for Project Jupyter that is called JupyterLab.

Menu Bar
The menu bar at the top of JupyterLab has top-level menus that expose actions available in JupyterLab with their keyboard shortcuts. The default menus are:
- File: actions related to files and directories
- Edit: actions related to editing documents and other activities
- View: actions that alter the appearance of JupyterLab
- Run: actions for running code in different activities such as notebooks and code consoles
- Kernel: actions for managing kernels, which are separate processes for running code
- Tabs: a list of the open documents and activities in the dock panel
- Settings: common settings and an advanced settings editor
- Help: a list of JupyterLab and kernel help links
Left Sidebar
The left sidebar contains a number of commonly-used tabs, such as a file browser, a list of running kernels and terminals, the command palette, and a list of tabs in the main work area:

If you move your mouse on the other icon of this left sidebar, a short information is given on its functionality.
If you click on the “stop button” icon, you can see what is currently running on your server and you can click on “SHUT DOWN” to stop a running Python notebook or Terminal.

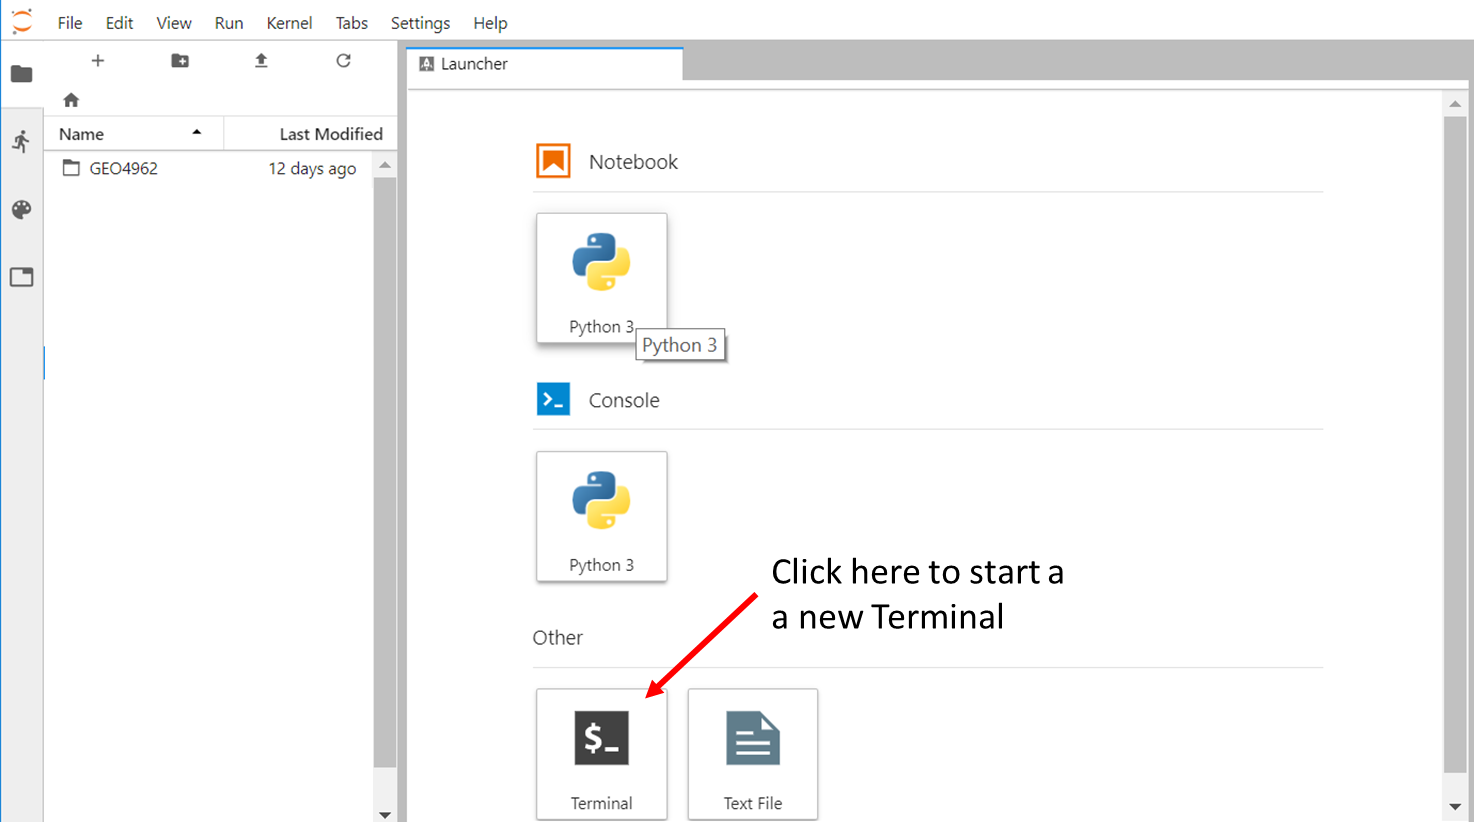
Start a new Terminal
Similarly, you can start a new Terminal by clicking on “Terminal” in the Launcher.

Tips
If the Launcher tab does not exist anymore in your JupyterLab, you can start a new one in “File –> New Launcher”.
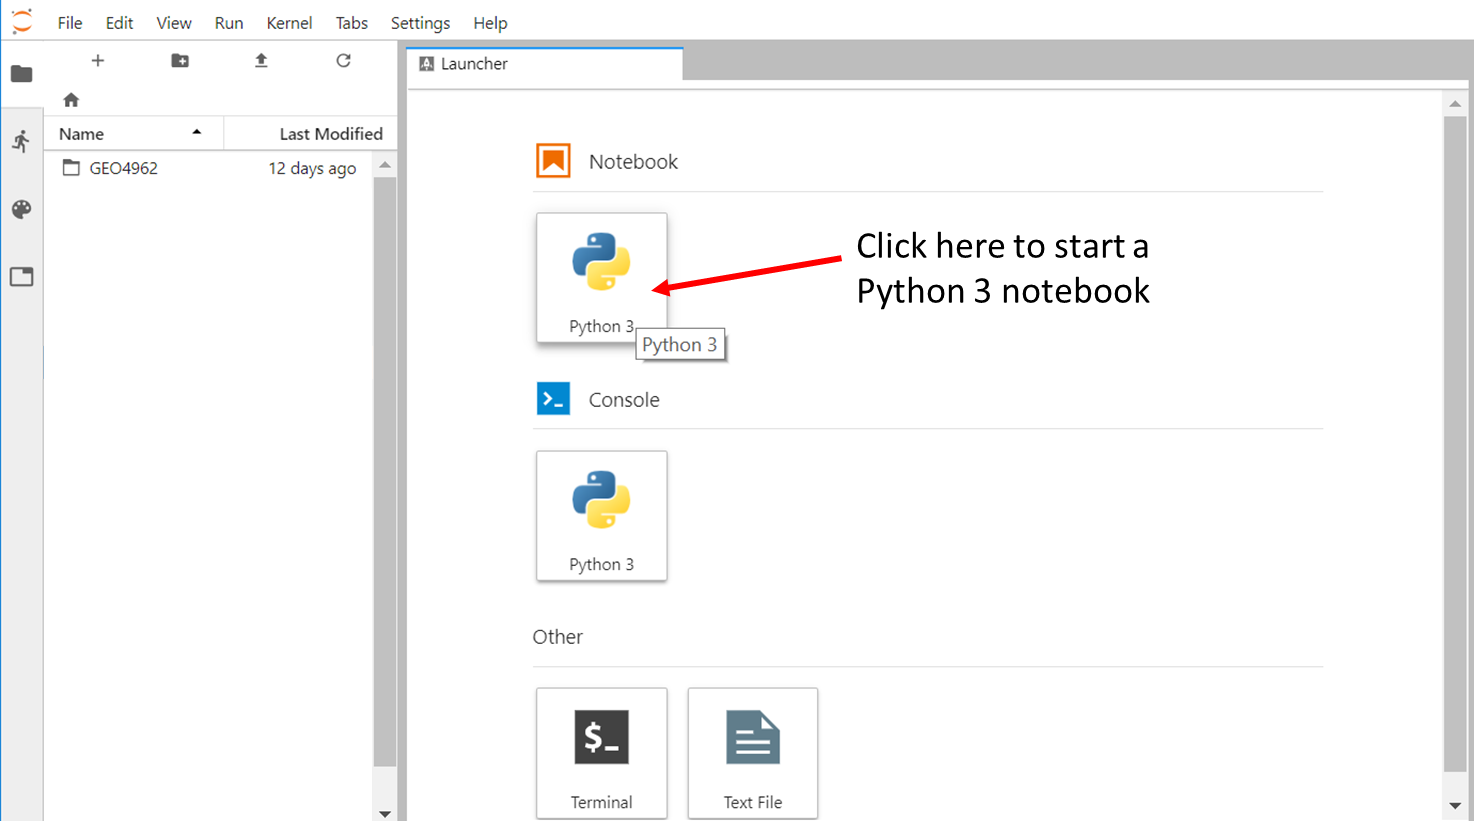
Create a new python 3 notebook
Go back to the File Browser left sidebar tab and in the launcher select Python 3 under the Notebook section:

By default, your new notebook is named as “Untitled.ipynb”:
- ipynb is the extension for any Jupyter notebook and you should make sure all your notebooks get this extension (otherwise it is not recognized as a Jupyter notebook)
- you can rename your jupyter notebook with the tab “File –> Rename Notebook…” or right click on its name.
Getting help in a jupyter notebook
Python (general and available outside jupyter notebook)
In addition to online help, you can use help function:
import matplotlib
help(matplotlib)
The Jupyter Notebook has two ways to get help:
- Place the cursor inside the parentheses of the function, hold down shift, and press tab.
- Or type a function name with a question mark after it.
Key Points
Jupyterhub